Welcome! It pains me as a designer to have a website that’s so ugly, but I mostly work in photoshop, not code. That said, my templates and tutorials have gotten over 3 million views and tens of thousands of downloads, and I know they’re really helping indie authors.
But they’ve always been an imperfect, temporary solution. The online book cover tool I started building ten years ago is only now, finally, actually finished – which means I can make high-quality covers in a way I never could before (I mean, sure I can do it in Photoshop, but then you’d have to pay me lots of money… this is meant as a budget solution where I can make templates that you can open and edit yourself.
On this page I’ll be adding long, detailed tutorials about how to use all the templates and the online cover design tool, but it’s not quite ready yet. In the meantime, I suggest grabbing the free book and watching the video series on cover design, to make sure you have a grasp of the basics (it’s fun to play around with design, but if you really want your book to sell, you absolutely have to understand why covers are so important and what precise features or details you must have on your cover).
I’ll replace this page soon, probably after a full site-wide overhaul, but down below you’ll find some older stuff I never actually got around to finishing, because the tool wasn’t as good as it is now (and that died when they got rid of flash).
Sign up to get the free sample templates bundle as soon as it’s ready. I haven’t figured out exactly how I’ll price everything yet but I’m sure it will cost more than it does now (which is basically free until I finish all the new templates and materials.
Thanks and good luck!
Derek Murphy
How to make a book cover in Microsoft Word
Microsoft Word is an ancient, buggy program but most of us have learned to live with it. I made my first batch of cover design templates with it because it was the most accessible software, and you can actually do surprisingly well if you know what you’re doing.
Here’s a video, but you can also grab the whole bundle of Word templates if you sign up.
OLD STUFF >> Probably best to ignore…
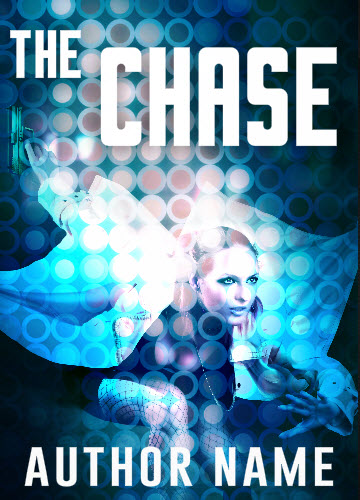
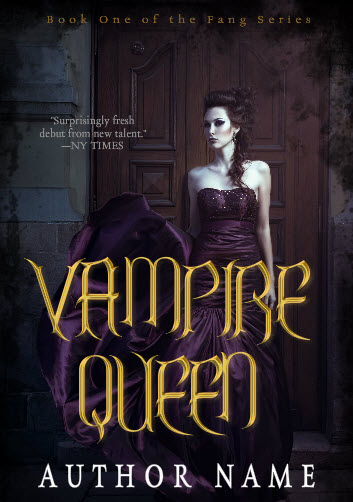
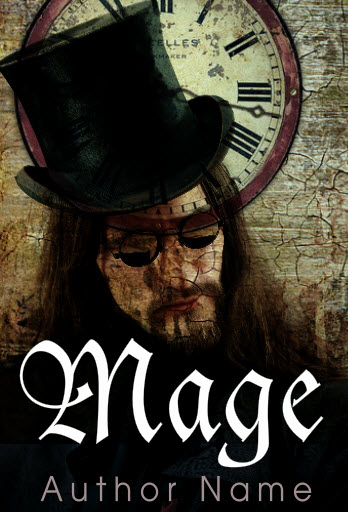
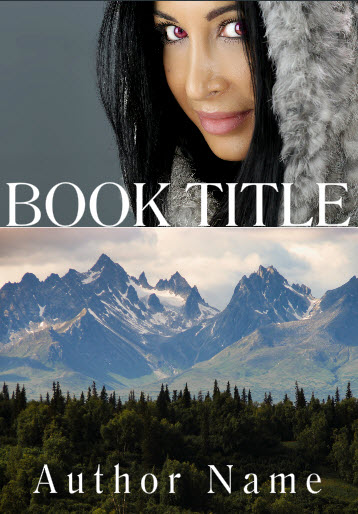
Here are a few of the covers I made quickly with the online tool. I’ll add more soon; you’ll be able to open these templates up directly into the tool to edit them online (with no software).

This guide will help you get familiar with the basic functions of our online Cover Maker.
We’ll start with basic, common actions and work up to higher-level design tips you can use to make your covers dazzle.
If you want some more free templates to use with the tool (including full print cover layouts, business cards, blog headers and more) you can get them here.
How to add an image
You can click on the JPG icon on the menu and choose “Add Image” – or go up to the “Image” item on the top menu.
When you import the picture, you can resize, stretch or rotate it. If you want to keep the dimensions the same, just grab one of the corners to resize, instead of the top or sides.
How to add text
Click on the big “T” icon and then “Add Text.” The tool is a little cumbersome. You have to hit “Add text and then right click again somewhere in the middle to drop the text box, and then you need to start typing some text in right away. If you try to resize or move it without any text, it will disappear. After it has some text in it, you can resize, move, change colors, and even adjust the letter spacing (an extremely valuable feature, that you won’t find anywhere else).
If you need to duplicate a text box you can just use the “Ctrl+c / Ctrl+p” shortcut. You can also use the keyboard arrows to move them around precisely.
How to change text styles
After you have some text, there are lots of cool things you can do with it. Under “Effects” on the left, you can add bevel, glow, shadow or transparency.
On the right side, under the magic wand icon, there are some more styles – they look pretty old fashioned and basic at first, but after you choose one you can go into layers and “FX” to tweak them.
HOWEVER – be wary of text styles. Bevel usually looks bad. A noticeable drop shadow or glow usually looks bad. You want to use natural contrast as much as possible, and you don’t want the text to jump out or look 3D – you want it to look like a natural, subtle part of the image itself.
How to change hues and colors
You can use the “Moustache” icon to get a few instagram-esque filters. They aren’t as good as I wanted, but some are pretty good.
And you can also adjust the colors from the Palette icon.
Later we’ll deal with adding color and gradient washes though, which looks nicer.
How to add a shape
Sometimes you want to add a shape – especially if you need some text to stand out better. I don’t like adding color bars, but a transparent color bar can do the trick.
How to change transparency
On the left, under “FX” you can change the transparency. Sometimes you’ll need to hit the “Undo” button on top or shortcut “Ctrl+z” to go back. Transparency will become more important once we start blending overlays.
How to save your files (and open again later)
You can save your files as JPG or PNG – or as a Project file. If you save a project file on your computer, you should be able to open it back up again in the program when you want to make changes or keep working on it. (Save your work, and save often!)
Sometimes when you upload your project files, a couple layers may seem stretched and inaccessible – if that happens, those layers probably got “locked.” On the bottom right under the “layers” tab, you can click the little padlocks to unlock them.
How to change the size
We’ve built in preset cover sizes that are perfect for Kindle and everywhere else.
The standard 6×9 is set for 300dpi, so it saves at 1800×2700. That’s my preferred size.
You can also choose 5×8, which saves as 1500×2400. The cover will be a little taller and narrower – close the Amazon’s “recommended ratio” ; but both will display fine everywhere, and the extra width of the 6×9 gives you more shelf space.
Make sure when you’re buying/download images, that you get ones at least 1500px wide – you can stretch them a bit but they will start to look bad if stretched too much. (Likewise, you don’t need images at 3000+… they’ll be slow to load.
Besides the two standard book sizes, we’ve built in a number of useful presets like Twitter and Facebook header, ad boxes, business cards, postcards and more (remember these are at 300dpi, so you can save as PNG and actually use them for print promotion materials). You can just resize, then reposition your text and graphics to fit the new size. Remember to zoom in or out to fit everything in your work area.
We’ve even left the option to set your own sizes – this gives you total freedom, and we can even use it to make full print covers (which we’ll talk about later).
Working with layers
So that’s the basics. Now for the fun stuff.
How to add clip art, badges or awards
I’ve added a package of clip art, badges and awards for you to play with – but I don’t recommend using them. It’s better to find your own so your book is totally unique.
Plus – there is very rarely a good reason to spoil a cover design with a badge or award.
Covers are about instant gut-level, emotional reaction. You’re not trying to convince or sell yet; just hook their attention with something beautiful. They can read about the awards your book won in the description.
However, you will probably want to add decorations, swirls, and other design flourishes to make your cover awesome.
#1. You can search out “transparent PNG” images with transparent backgrounds and just add them in over your image. You can change color if you need to. It’s a little trickier if the thing you want to add already has a background. There’s no easy way to strip the background out, so you may need to hire someone on Fiverr.com to do this.
#2. But in many circumstances, you can get away with it by using the blending options.
How to blend images together
Unfortunately we couldn’t figure out a way to blend images together well with this tool. So if you need a simple, “landscape on the bottom and kissing couple on top” cover, it isn’t exactly straightforward, and you may need to hire someone on Fiverr.com to blend things. The closest we got is a “feathered edge” feature. But you can use transparency and overlay, and blending options, to get some pretty awesome effects.
You may need to “hide” the borders between photos with an overlay or splash or box, which can also frame the text.
But if you want that “scene + characters” you’ll need to take your landscape and add a lot of sky to it first, then save that as a JPG, then upload that as a new picture (so there’s no hard edge, and then you can blend characters into the sky.
How to add a divider or decorative flourish
How to add gradient color washes
How to add a gritty, grunge border
How to add decorative corners or a frame
How to add blood splatters (and other overlays)